

How to connect Smartemailing and AffilBox


What the linking does: Whenever you add a new partner, they are automatically added to the list in SmartEmailing that you have designated.
You can then send a nice automated welcome email to each partner.
This will make any future communication with your partners very easy. You can then send all partners at once info about your news, changes, or perhaps invite them to invoice you in bulk.
Are you creating a non-paid campaign and need to copy the email from the form in SmartEmailing into AffilBox? Then this guide is for you.
Settings in Smartemailing
Chapters
Creating a custom field
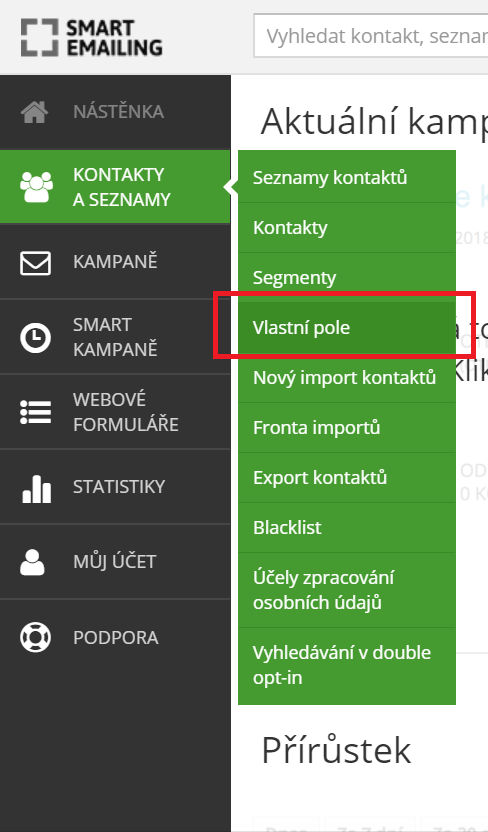
First, open your SmartEmailing and log in. In the left menu, select Contacts and Lists. You will then see another menu. Here, find the Custom Fields item and click on it.
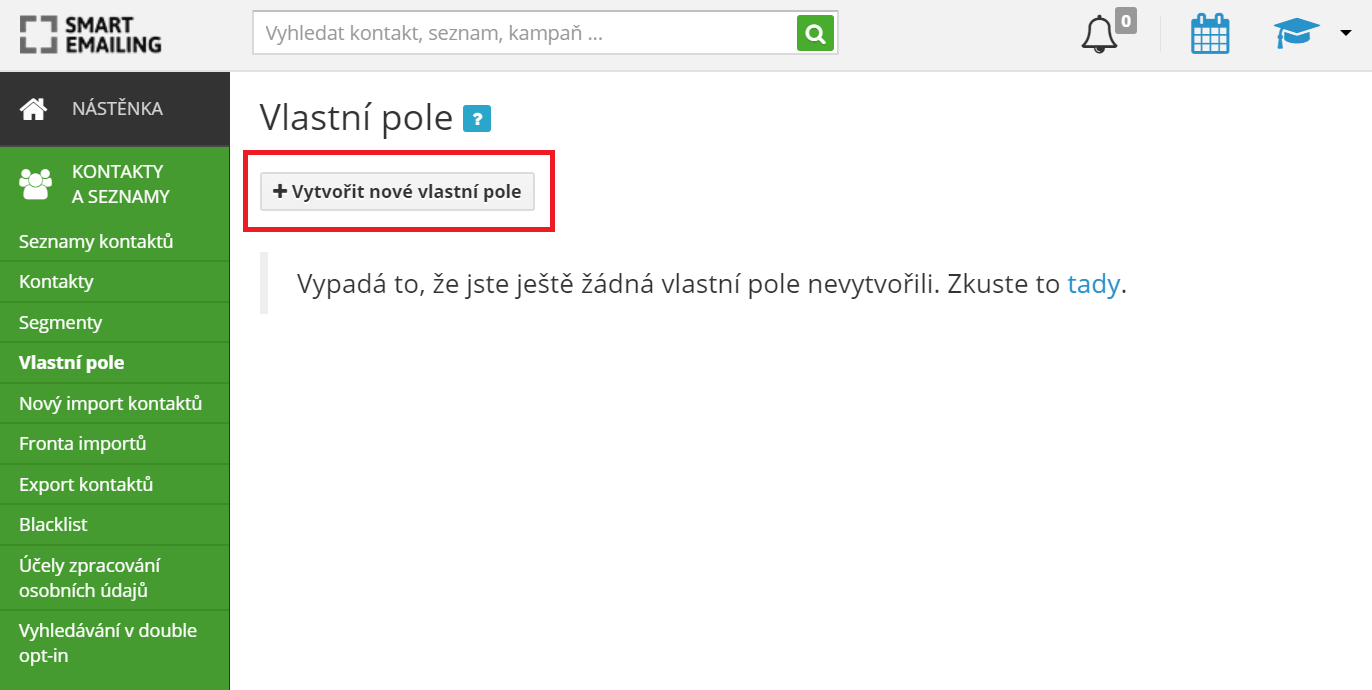
Now click on the Create new custom field icon.
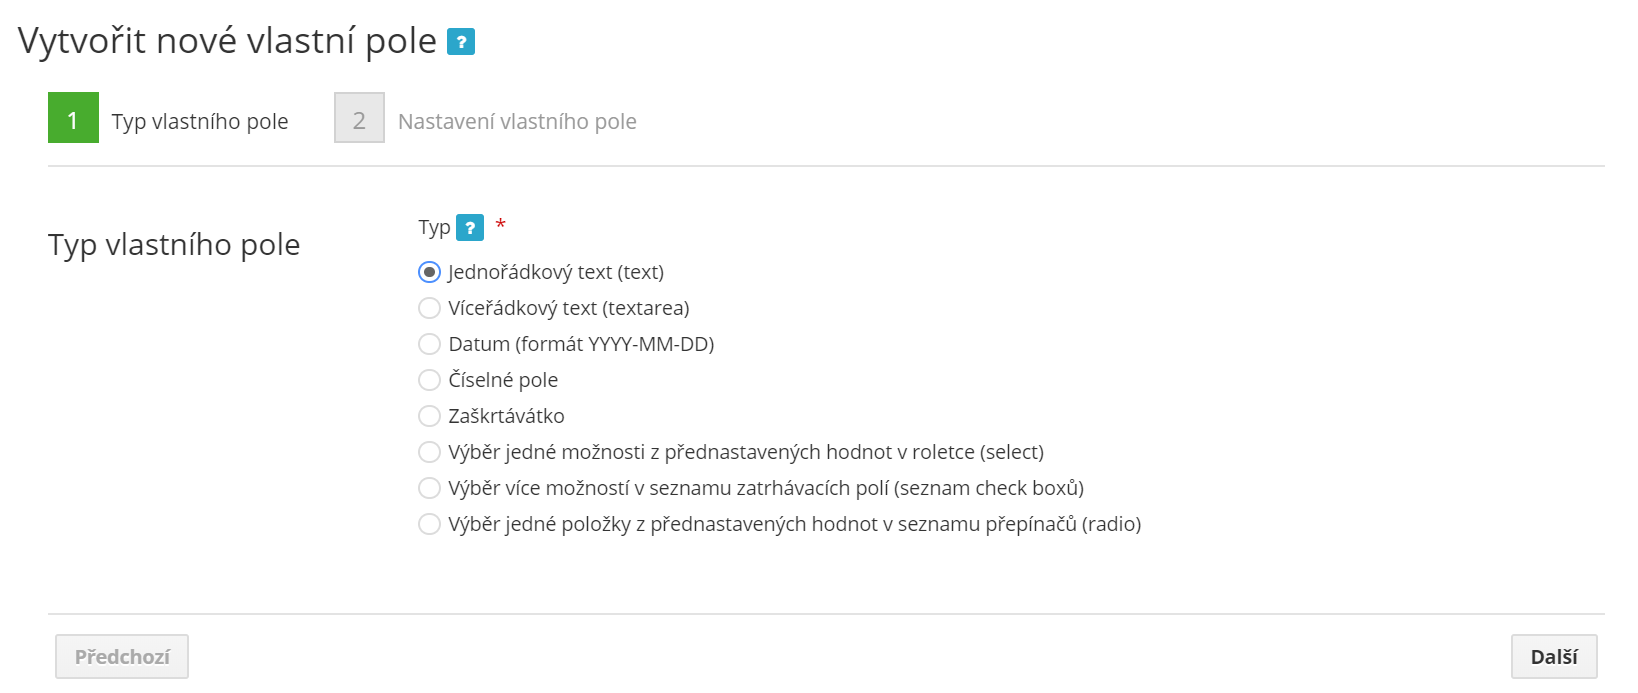
Select Single line text (text) as the type and click next
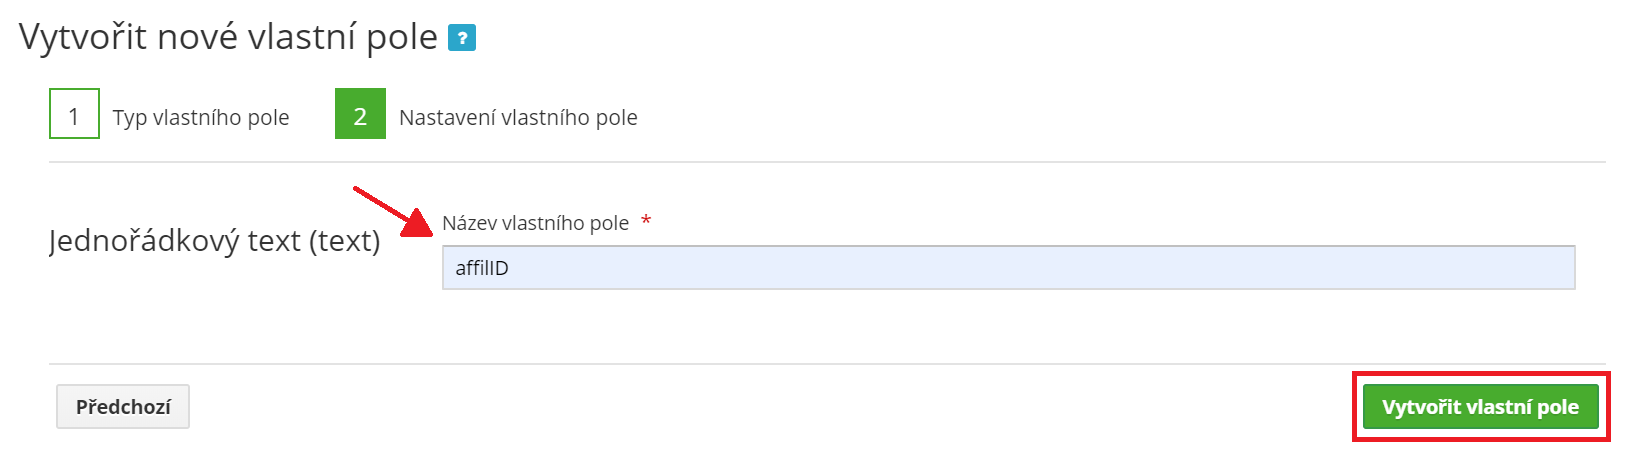
Name your custom field, for example, affilID, and click the Create Custom Field button.
In the overview of your text fields, note the ID – or serial number – of the custom field you just created.
Memorize or note this number – you’ll list it under your field ID code in the plugin settings.

Create a list to match your new partners
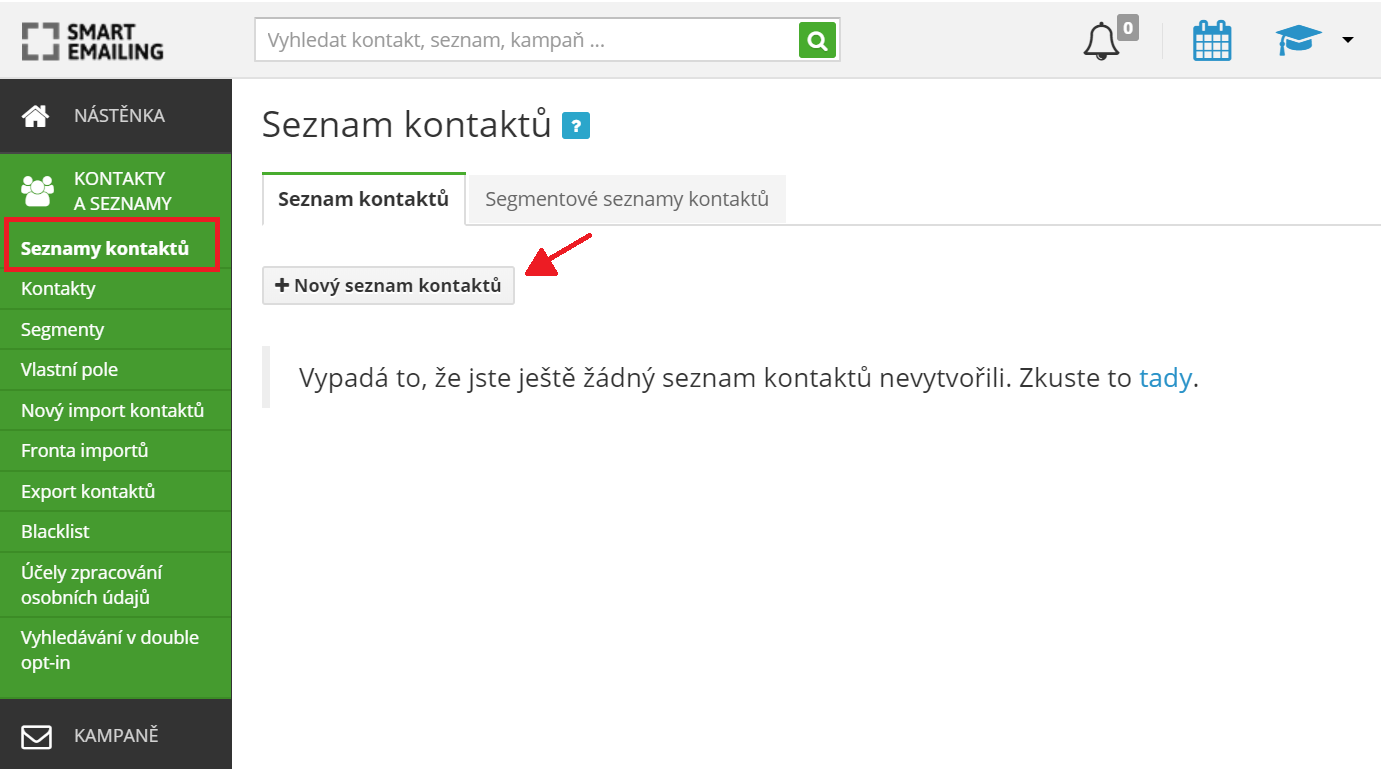
In your SmartEmailing, click on the tab called Contacts and Lists in the left menu and select Contact Lists from the next menu.
Once you see the contents, click on the New Contact List button.
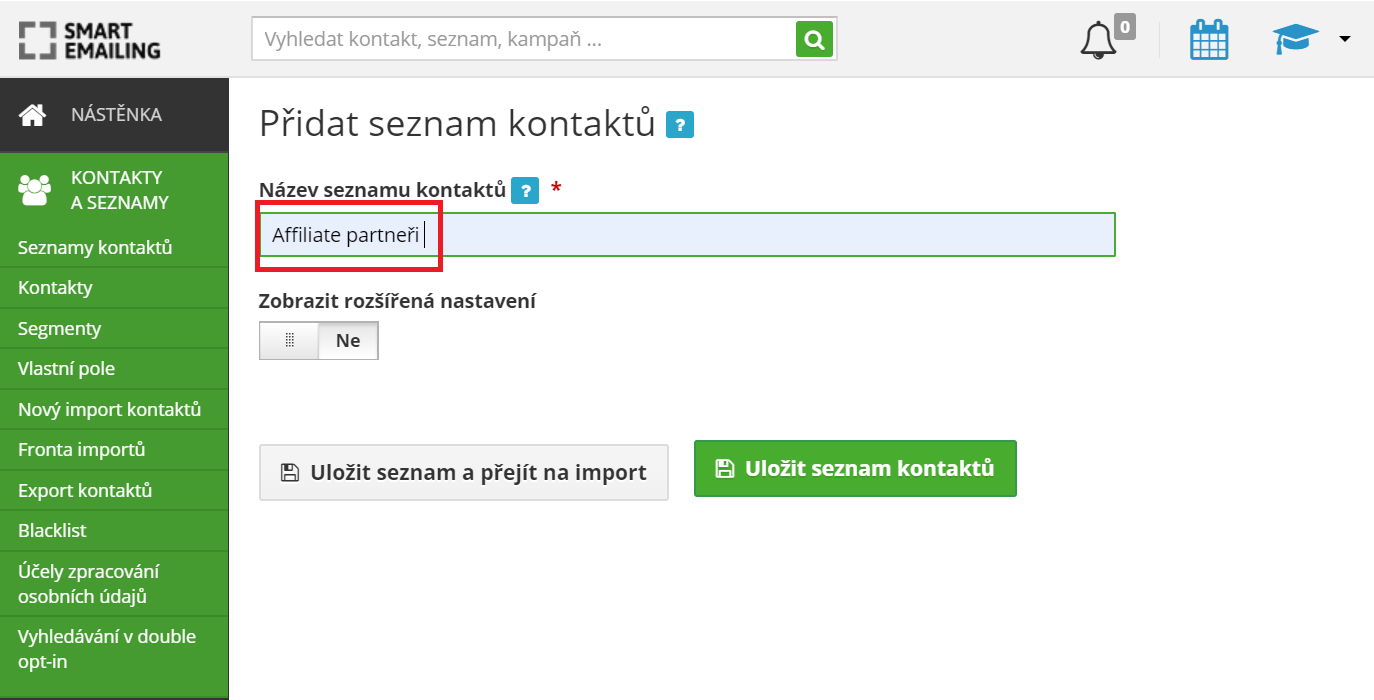
You can call it an affiliate partner, for example. Then save your list by clicking Save Contact List.
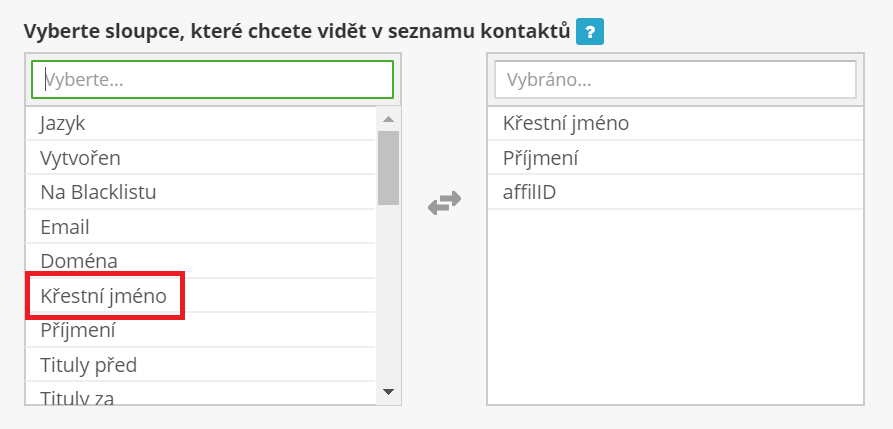
The important thing in this part is in the last step – before finally saving the new list – to select the columns you want to see in the contact list – First Name, Last Name and also the item we created in the previous steps – or called AffilID.
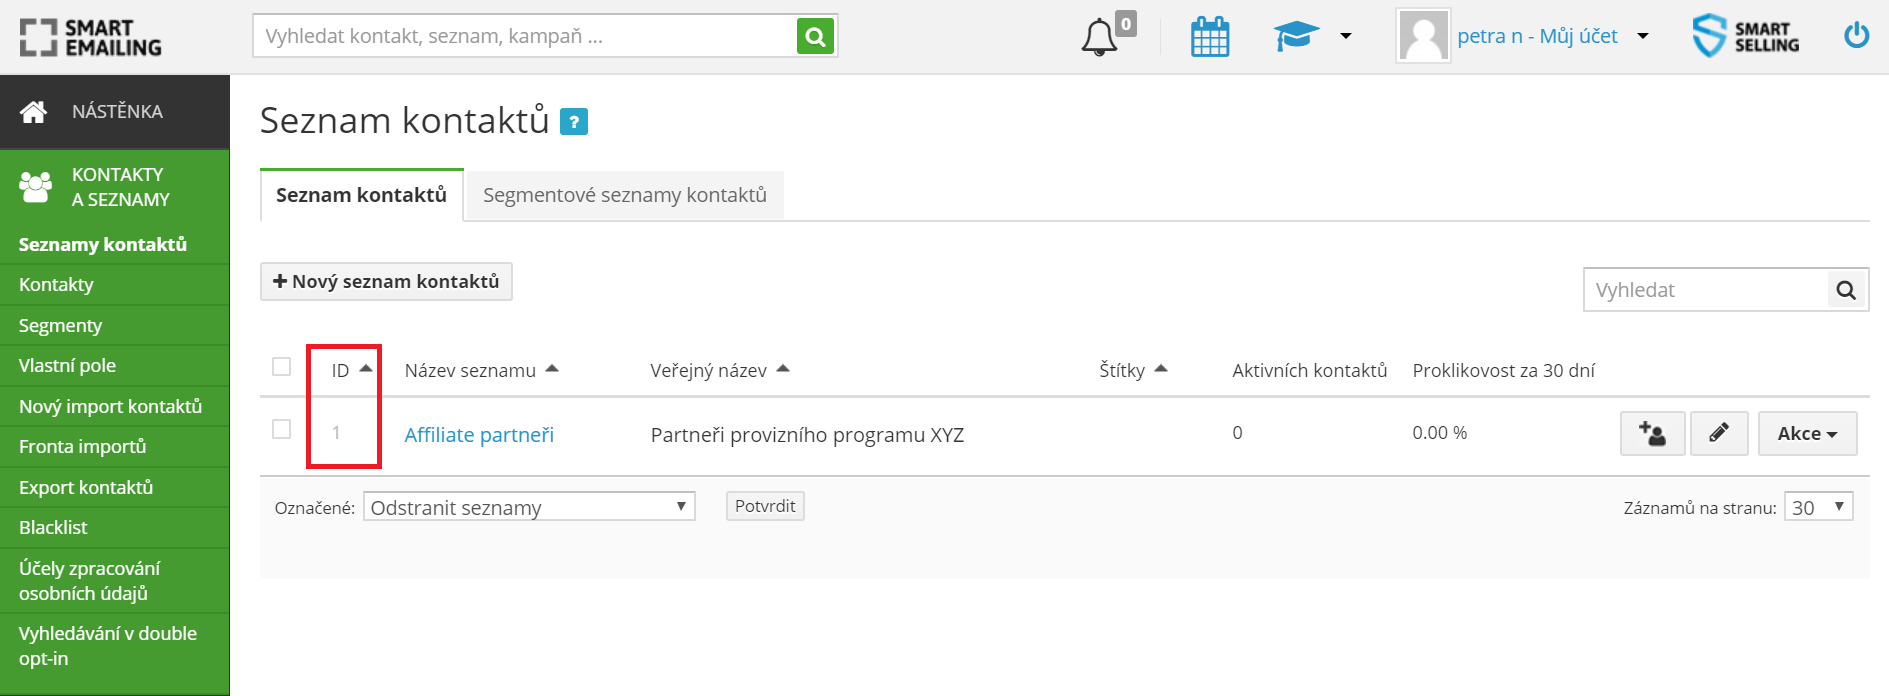
Then all you have to do is save everything.
Again, look at the overview of all your contact lists and note the serial number that has been assigned to your new affiliate list.
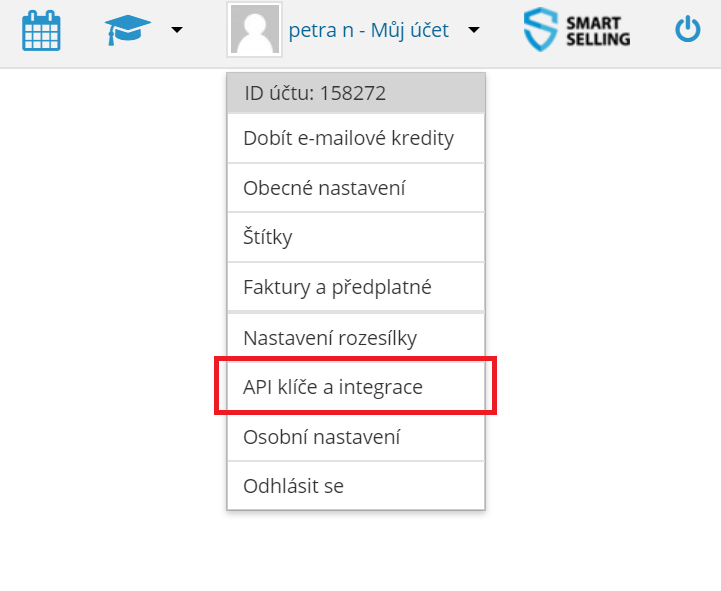
API key – to link everything correctly
The last piece of information you’ll need can be found in the My Account tab – you’ll find it in the top right corner of your SmartEmailing interface. Select API keys and integrations.
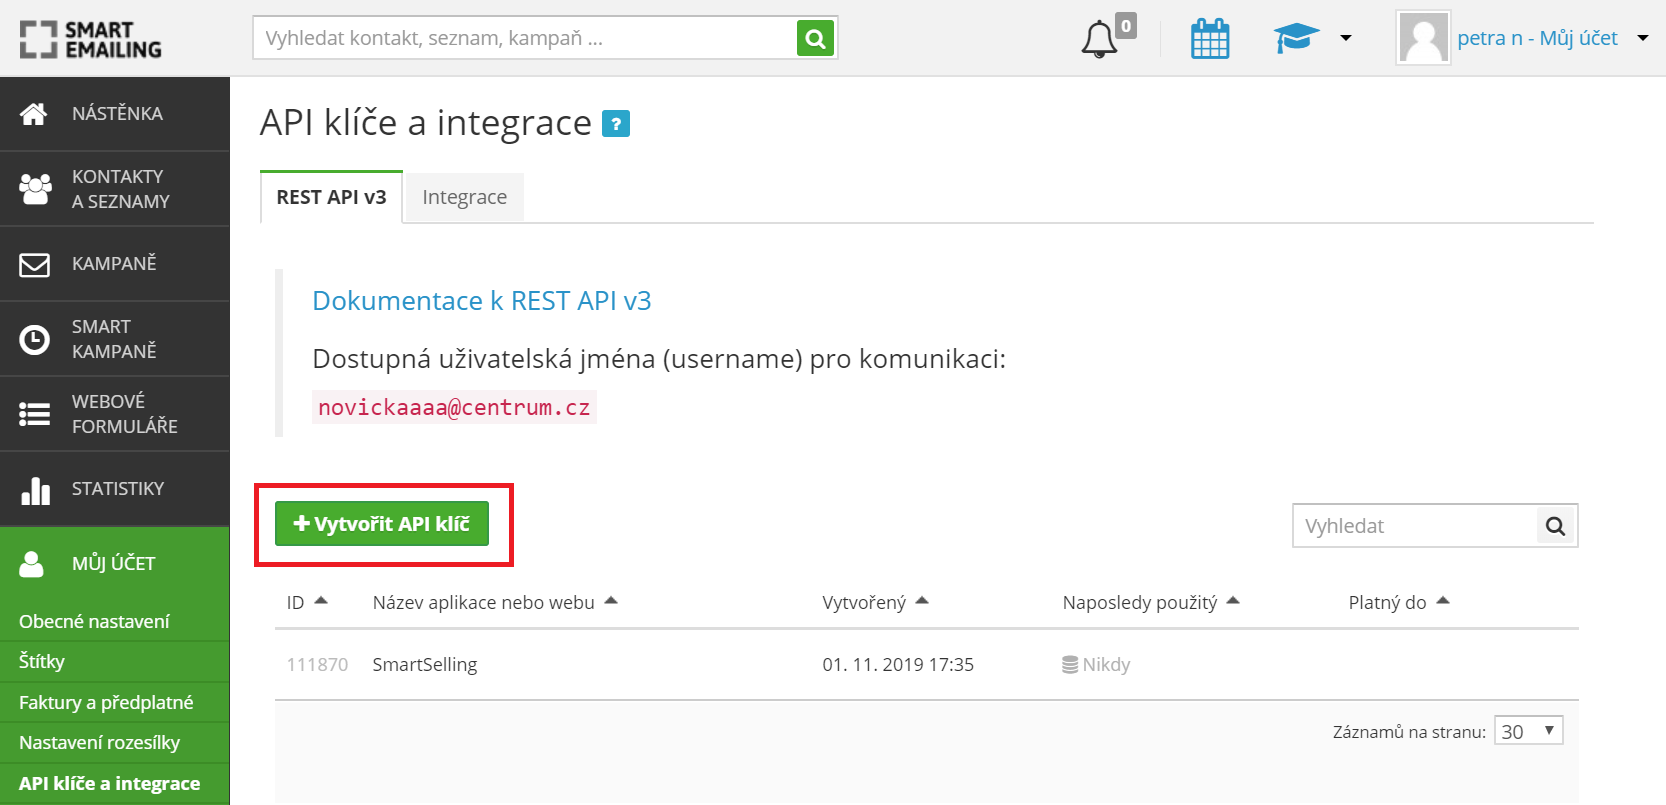
Now we will need to generate a unique API key, which we will need further down in the AffilBox settings.
Click on the Create API Key button.
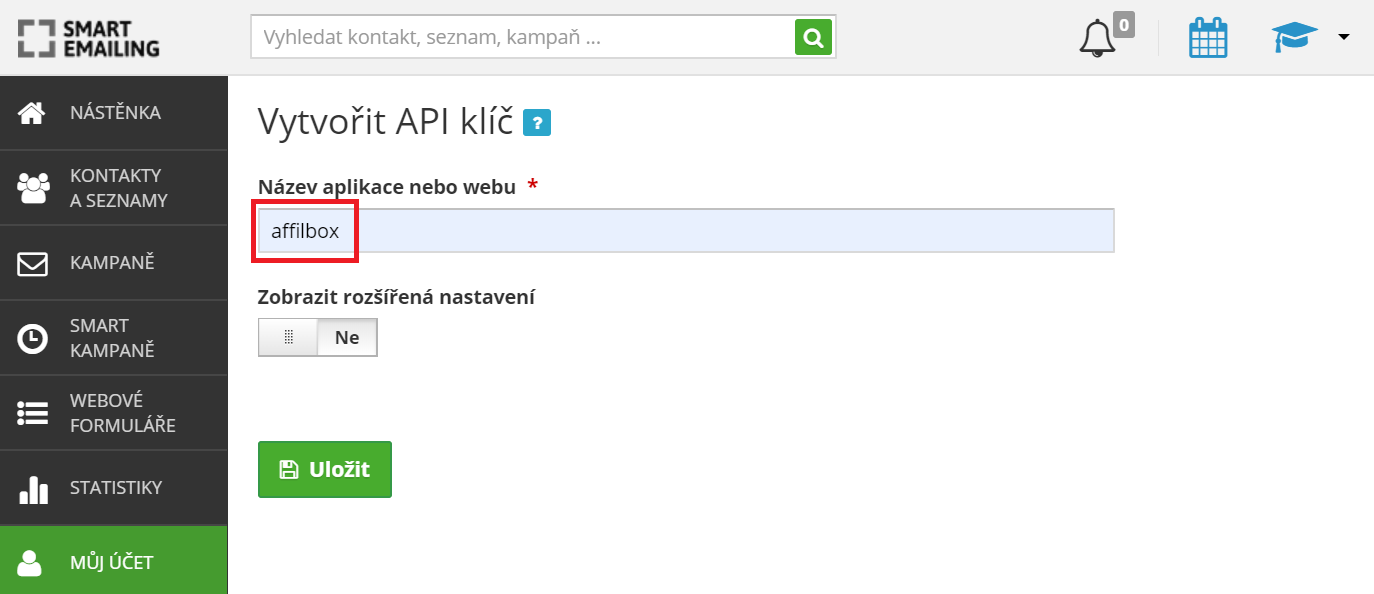
Name the API key you created, for example AffilBox, and save it.
You will now see your API key. For security reasons, it will never be shown to you again. Therefore, we recommend that you copy your API key.
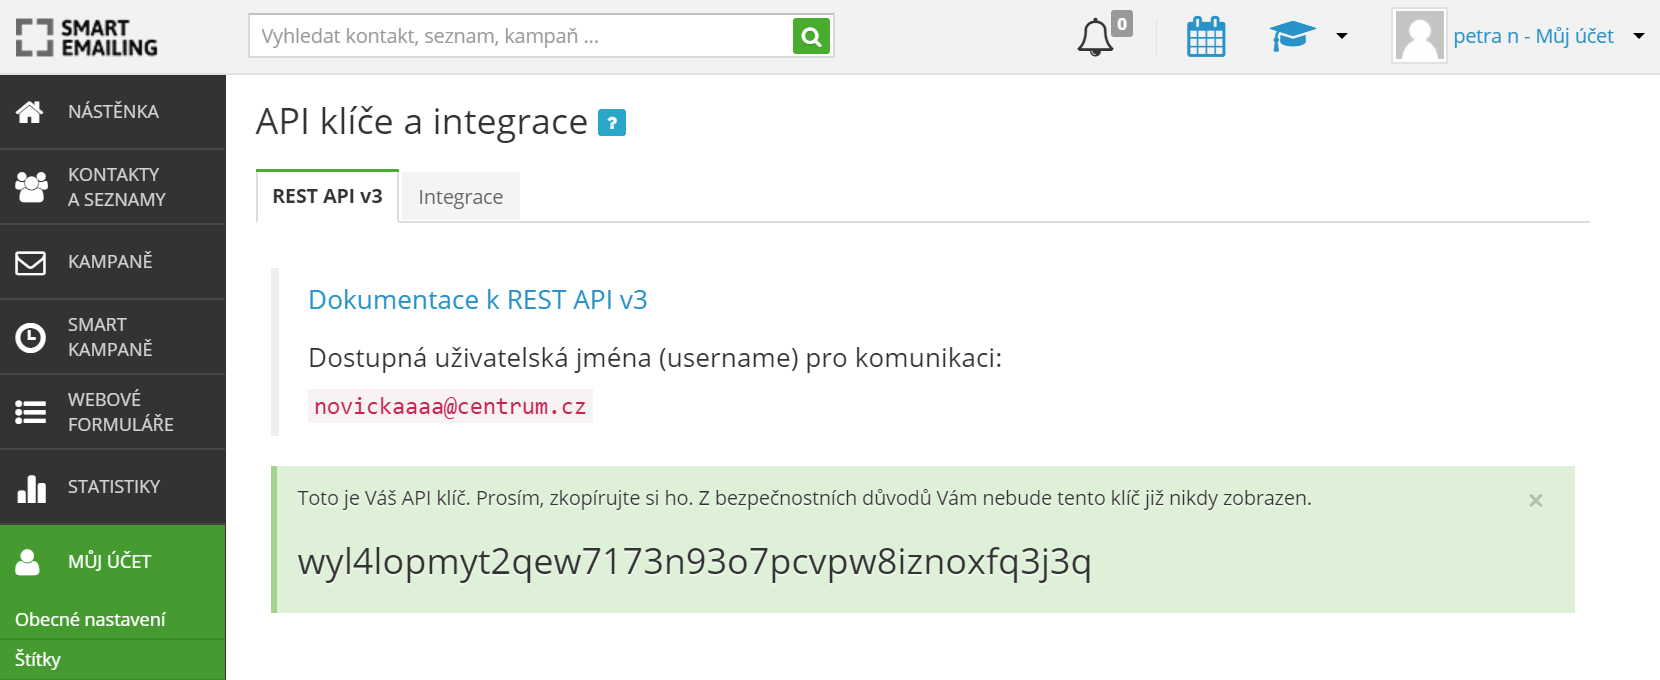
Then paste this key into the plugin settings – see below.
At this point we have everything we need in SmartEmailing done and can fill in the settings in AffilBox.
Settings in AffilBox
In your AffilBox license, once you log in, you will find the plugins tab in the left side menu.
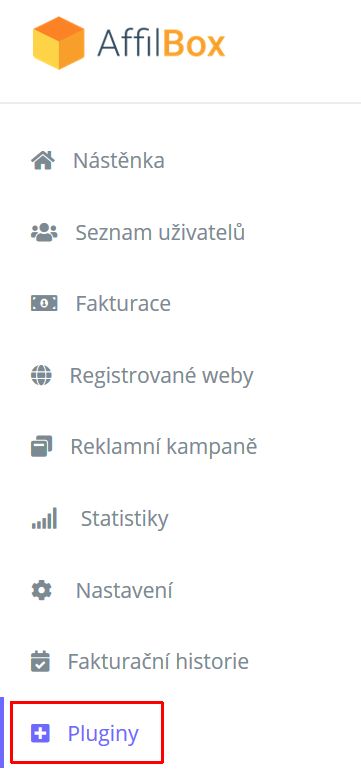
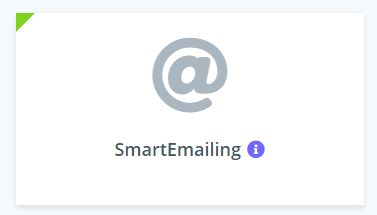
Find the SmartEmailing plugin and click activate for free.
Now all you have to do is fill in the items and numbers we just created. Remember, the account owner’s email in this case is the email you’re signing into SmartEmailing with.
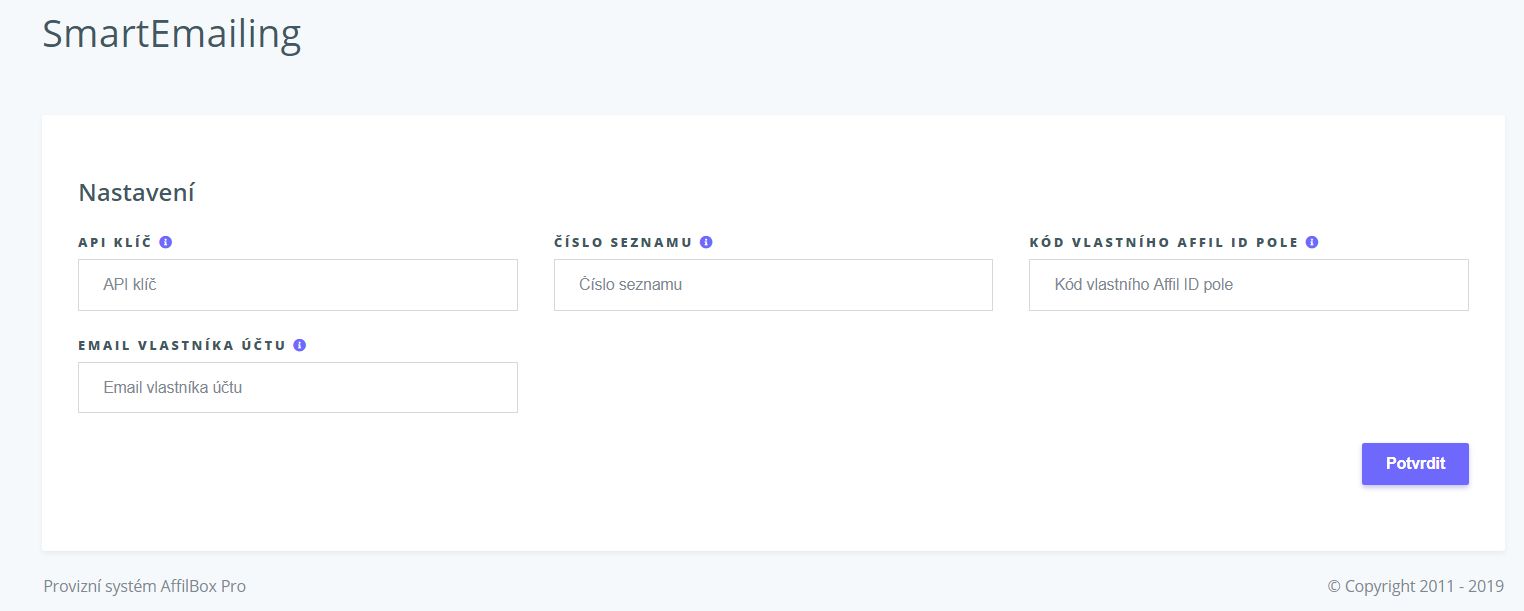
Save it and you can test to see if everything works properly – as soon as a new partner signs up, they should appear in your new list in SmartEmailing.
Congratulations on a job well done!
In SmartEmailing, you can create a smartcampaign for your new partners, where you can, for example, motivate them to continue working with you, invite feedback after some time, etc.
Questions? Was something not fully understood? let us know, we’ll be happy to help and advise you!
Are you creating a non-paid campaign and need to transcribe an email from a form in SmartEmailing to AffilBox? Then this guide is for you.
Leave a comment
Your email address will not be published. Required information is marked with *